Creating a Project建立專案
vue create
執行下面指令建立新專案:
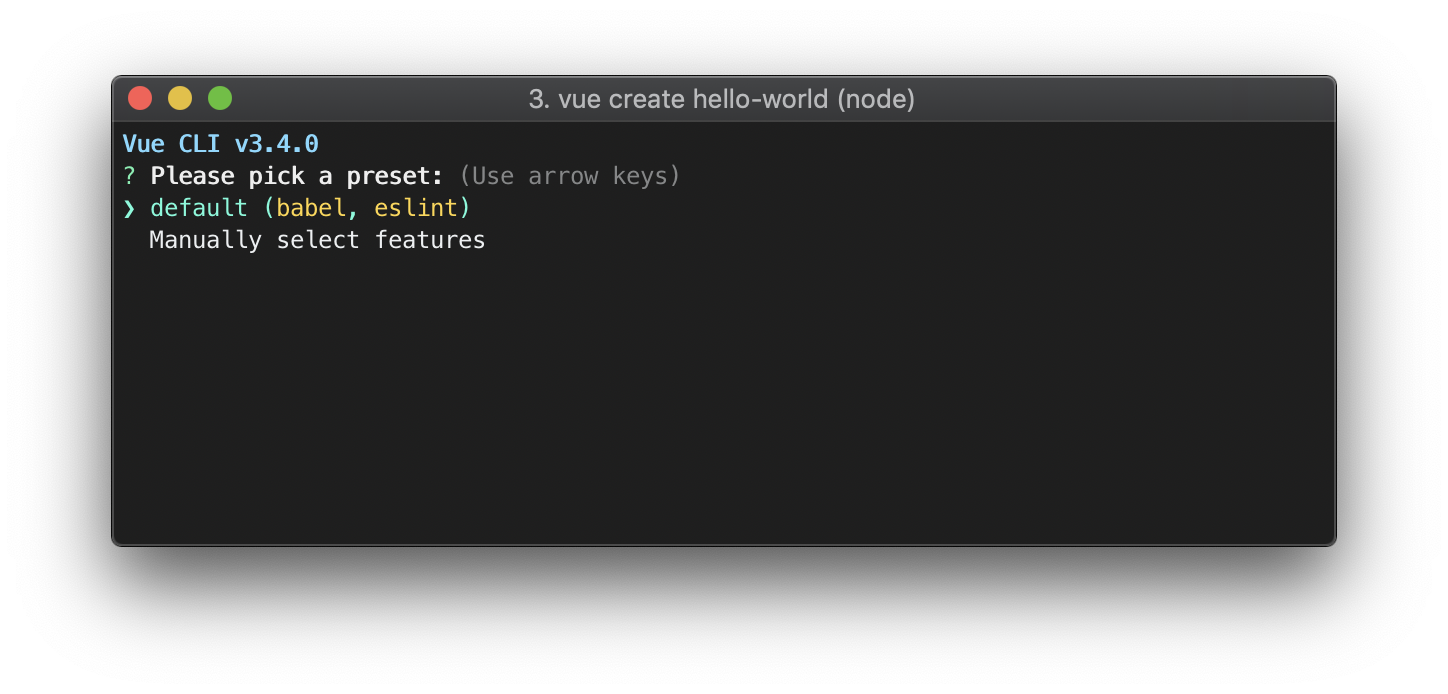
vue create hello-world
警告
如果你在Windows使用Git Bash with minTTY, 互動命令列不會生效。你必須使用
winpty vue.cmd create hello-world.
你需要選擇一個preset。預設preset包含basic Babel + ESLint 設定,或選 "Manually select features" 去挑選你需要的功能:
預設設定適合快入建立新專案的雛形,手動設定適合正式環境導向的專案
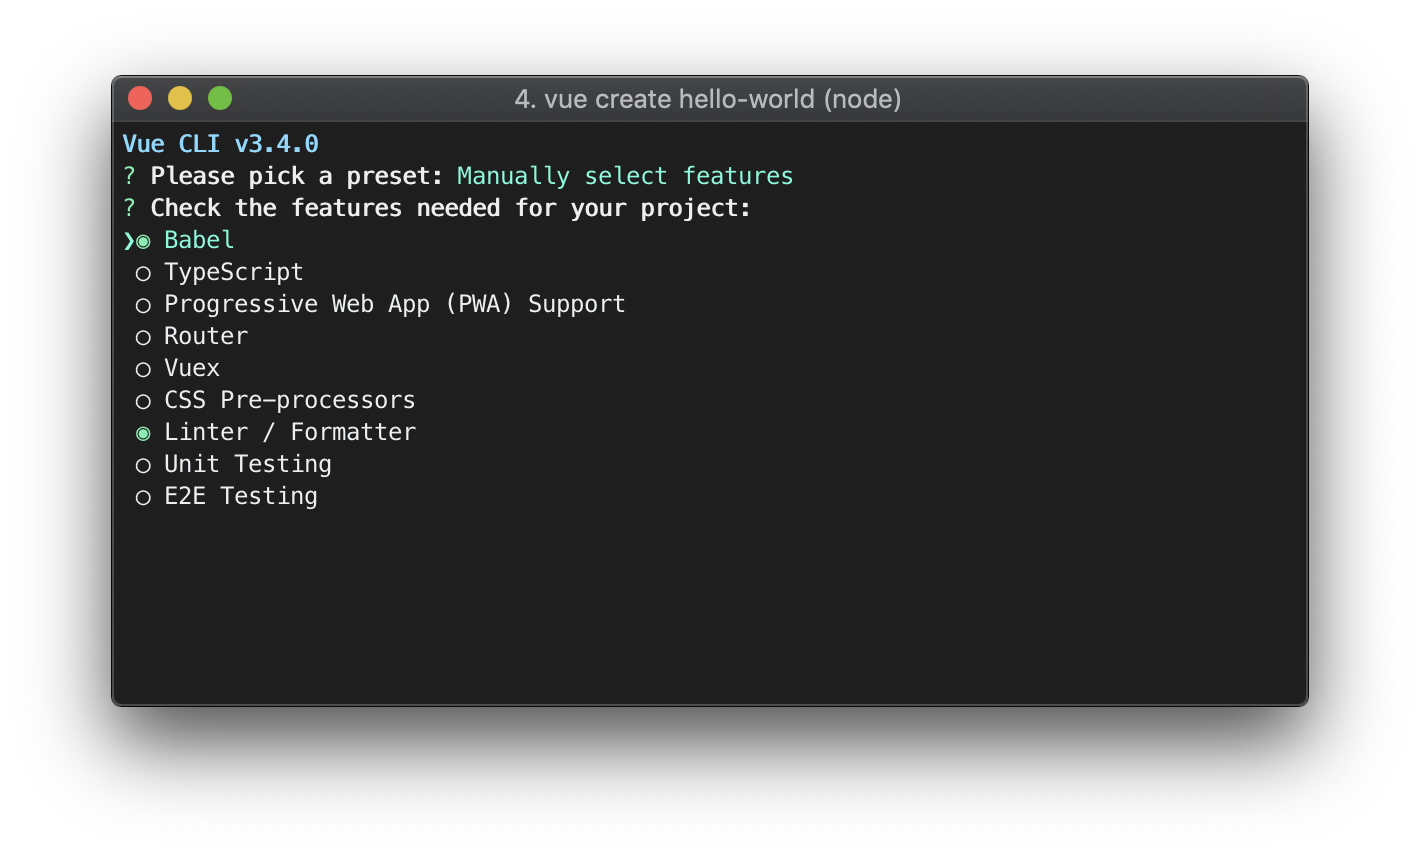
如果選擇手動選取功能,最終可儲存你的選項作為preset,之後就可以重複使用。 我們會再下個章節討論presets 及plugins 。
~/.vuerc
儲存的presets將存到使用者家目錄下,名為.vuerc 的JSON 檔。如果你想要修改存起來的presets / options,你可以去編修此檔。
在專案建立過程,你也可選擇想要的套件管理器(package manager),或使用 or Taobao npm registry mirror 。你的選擇會被存到
~/.vuerc。vue create 指令有很多選項可以用 :vue create --help
Usage: create [options] <app-name>

create a new project powered by vue-cli-service


Options:

  -p, --preset <presetName>       Skip prompts and use saved or remote preset
  -d, --default                   Skip prompts and use default preset
  -i, --inlinePreset <json>       Skip prompts and use inline JSON string as preset
  -m, --packageManager <command>  Use specified npm client when installing dependencies
  -r, --registry <url>            Use specified npm registry when installing dependencies (only for npm)
  -g, --git [message|false]       Force / skip git initialization, optionally specify initial commit message
  -f, --force                     Overwrite target directory if it exists
  -c, --clone                     Use git clone when fetching remote preset
  -x, --proxy                     Use specified proxy when creating project
  -h, --help                      output usage information
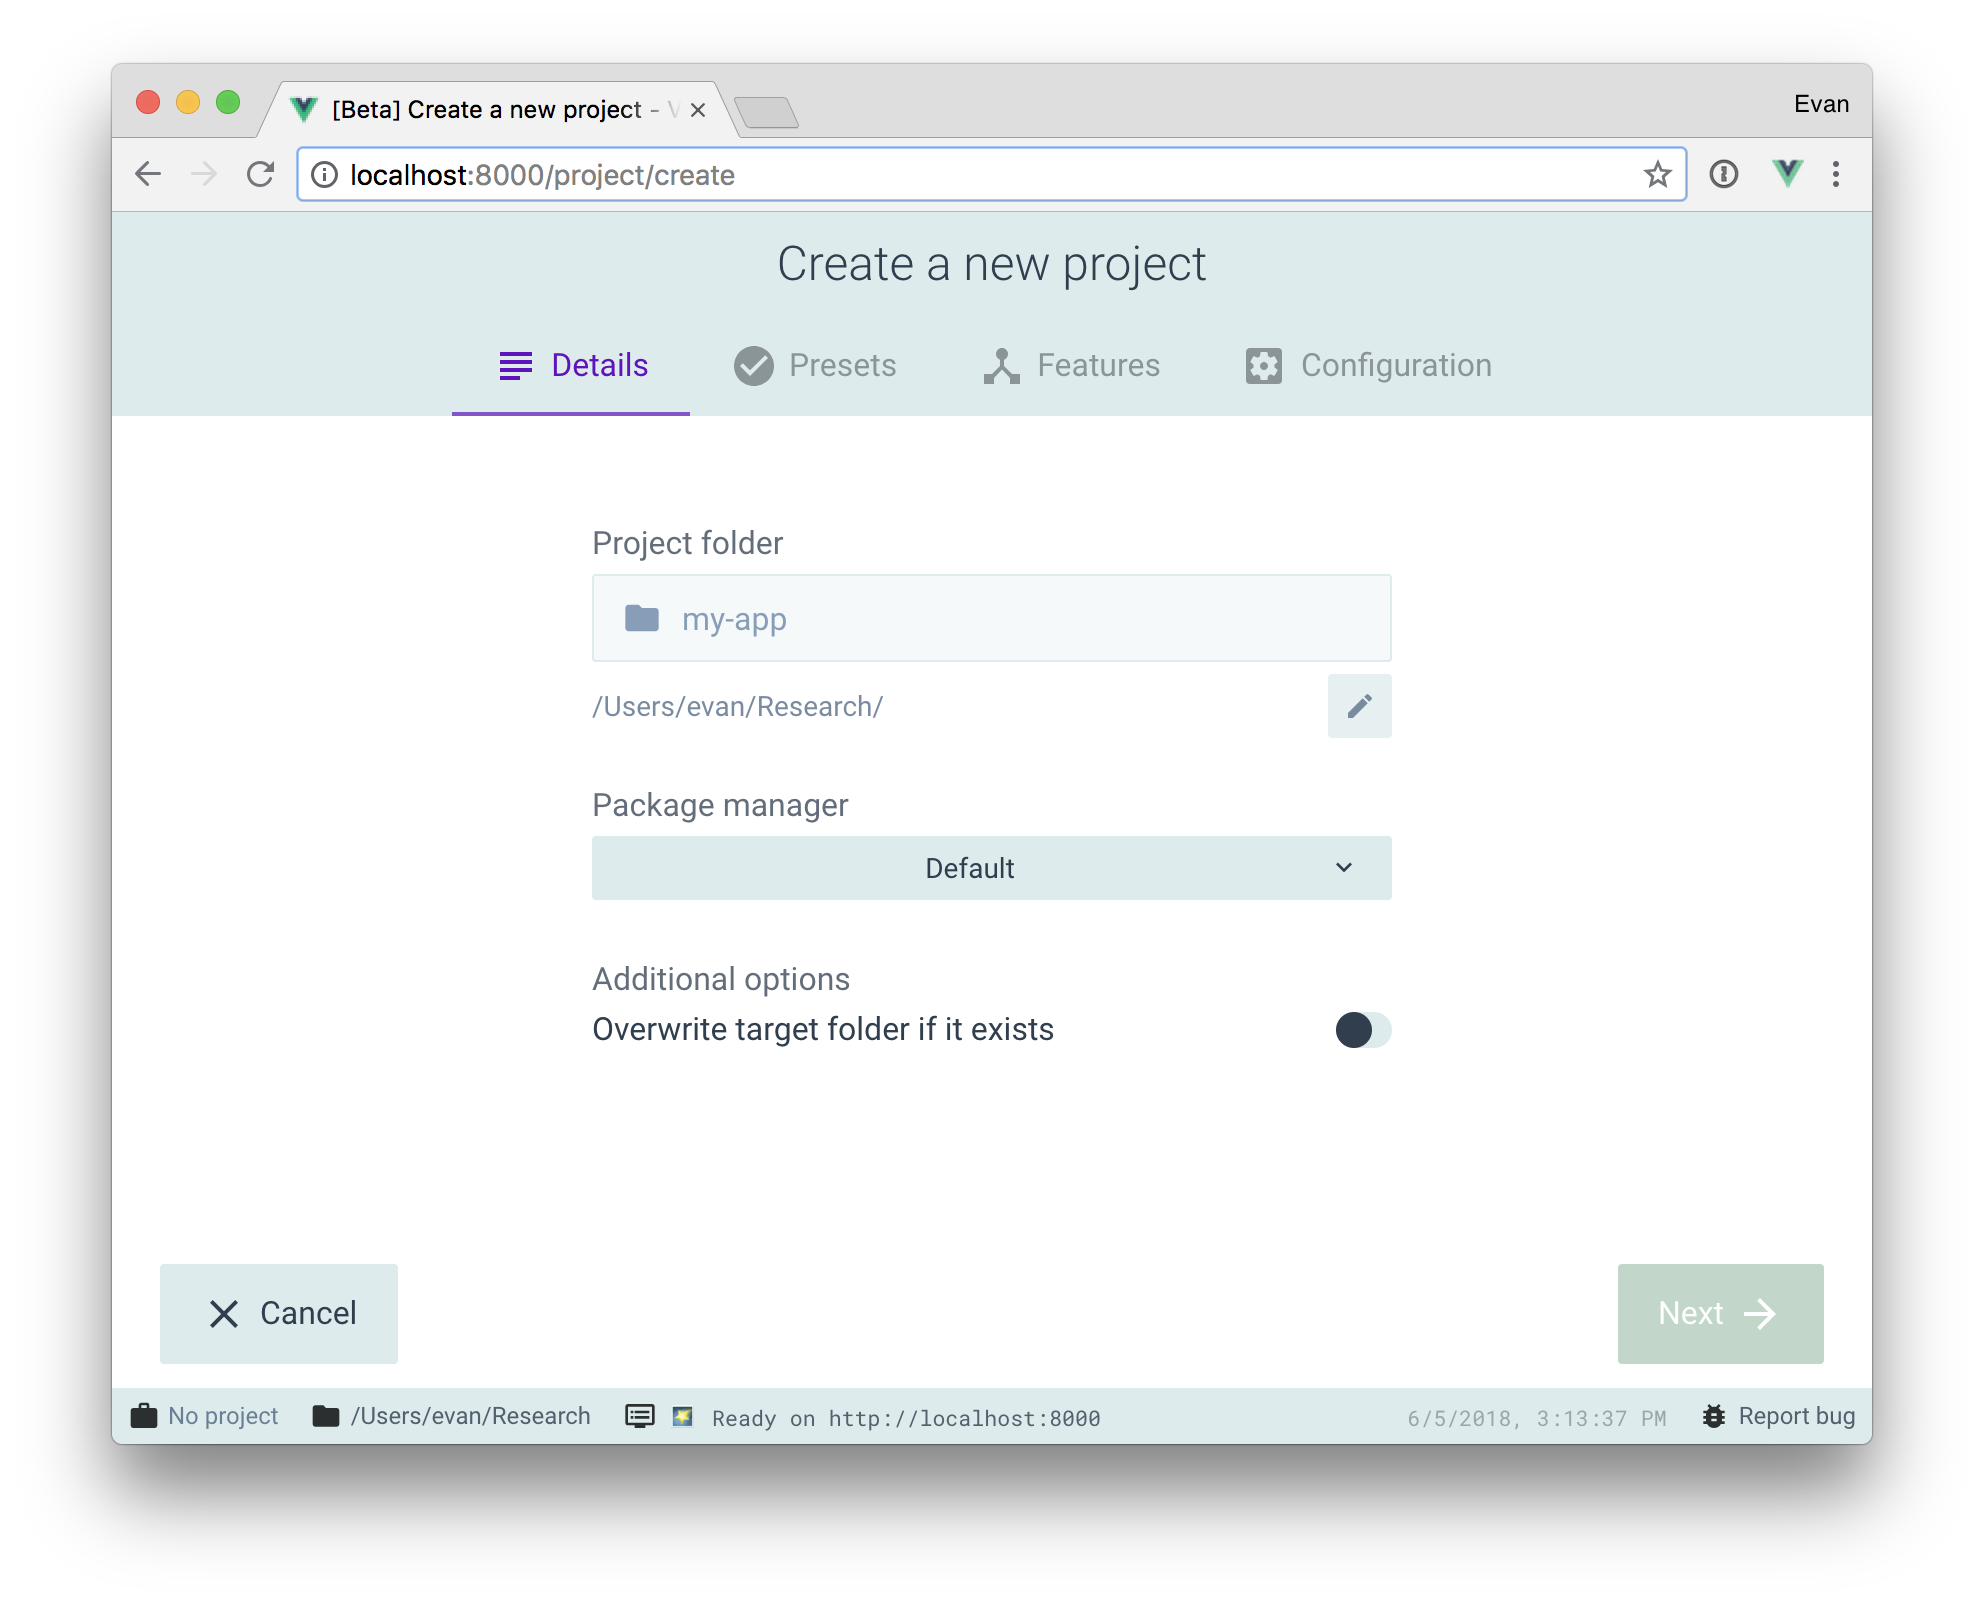
使用GUI
你也可透過
vue ui 命令使用圖形化介面建立及管理專案:vue ui
上面的命令會在瀏覽器打開圖形化介面,並導引你專案建立過程:
2.x 模版Templates (Legacy)
Vue CLI 3 使用相同的
vue 指令,所以覆蓋了 Vue CLI 2 (vue-cli)。如果你仍需要使用就版的 vue init 功能,你可以安裝global橋接 :npm install -g @vue/cli-init
# vue init now works exactly the same as vue-cli@2.x
vue init webpack my-project
沒有留言:
張貼留言